


Whether you're a faculty member, student, or administrator, it's likely you'll have used Moodle at some point. It's a great platform for learning but (like all other high performance application) requires load balancing to facilitate the secure and timely distribution and delivery of that data. Here we take you through the steps needed to achieve that.
Why is Moodle's Learning Management System (LMS) used in higher education?
Moodle LMS is an open source learning platform used to create personalized learning environments. The application is designed to provide a single, secure, integrated learning platform which contains learner-centric tools and resources, and collaborative learning environments to empower both teachers and students.
Used by more than 340 million users worldwide, it comes in 120 different languages, offering drag-and-drop features, and a straightforward interface. The benefit of being open source, is that the code is publicly accessible and can be customized by in-house IT teams and tailored to the needs of individual higher education institutions or even enterprise.
We love it because it integrates really well with other external applications to achieve additional functionality. It's also web-based which means it can be accessed from anywhere in the world (except for those using Geo-blocking).
Why does Moodle LMS need load balancing?
Moodle needs to be load balanced because this solves the key challenges of high availability, data security, and accessibility in the following ways:
1.Prevents downtime and improves reliability
Load balancers can be used to improve the performance and reliability of on premise learning solutions, many of which are pivotal for the delivery of core education services. The load balancers manage server capacity and alleviate bottlenecks at peak times to improve response times and application performance for all users, whether they are students, researchers, faculty or support staff.
Load balancers also prevent downtime by intelligently rerouting to another server in the event of server downtime or maintenance. This avoids impacting the end user, and delivers an uninterrupted service.
2.Optimizes data security
Load balancing increases durability across multiple data centres or 'availability zones', protecting the integrity of any stored data using cross-site replication. It guarantees learning continuity in a crisis by ensuring that the desired Recovery Time and Recovery Point Objectives are met. For education institutions where the acceptable amount of data loss following a disruption such as a ransomware attack is typically zero, the load balancer failover happens seamlessly to avoid any data loss stored in object storage applications or similar.
When a failure event or cybersecurity attack occurs, no backup data is ingested into the local storage. This form of immutable data backups means impacted applications can be brought back online almost immediately, and data loss and corruption is avoided.
3.Improves remote access
Load balancers can be used with any of the leading remote access platforms, including Citrix XenDesktop, Microsoft Remote Desktop Services and VMware Horizon View, to manage the number of remote connections per server and spread the load, particularly at peak times.
Using a load balancer therefore improves the fault tolerance of vitals system and ensures that staff and students can continue to access the databases and applications they need from anywhere.
How do I load balance Moodle LMS?
Deployment options
Below you will find step-by-step information on how to deploy and load balance the Moodle Education application. For the purposes of this walk-through, I’ve used two deployments:
- One in Ubuntu 22.04
- One in Windows 11
For Ubuntu, I’ve used this Moodle installation guide.
Note, you will also need this command:
sudo a2dismod php8.1 && sudo systemctl enable --now apache2
For Windows, I’ve used this Moodle installation guide.
Note, in order to be able to access Moodle from a different device, on the initial installation, you will need to access it via the IP address that the machine uses, instead of localhost, or 127.0.0.1. Also, make sure to disable any applications that might be using port 80 on Windows (e.g. Skype) as the installer uses the same port.
We have two possible ways of deploying, depending on client requirements:
- L7 HTTP; or
- L7 HTTPS
I'll run through the step-by-step deployment instructions for each below. But before we go any further, DO NOT forget to turn off your firewall in Windows, and make sure you have ports 80/443 open on Ubuntu.
Now you're ready to get started...
L7 HTTP deployments
1. Deploy the Loadbalancer and get through the deployment steps and setup your management interface, gateway and Domain Name System (DNS).
In my example, my Loadbalancer interface works on 192.168.100.10, the gateway is 192.168.100.1, and the Real Server//Moodle IP is 192.168.100.51.
2. Once connected to the WebUI of the Loadbalancer, navigate to Cluster Configuration>Layer 7 Virtual Services, and click on the Add a new Virtual Service button.
In my example the Virtual IP is 192.168.100.11, and the name is Moodle:
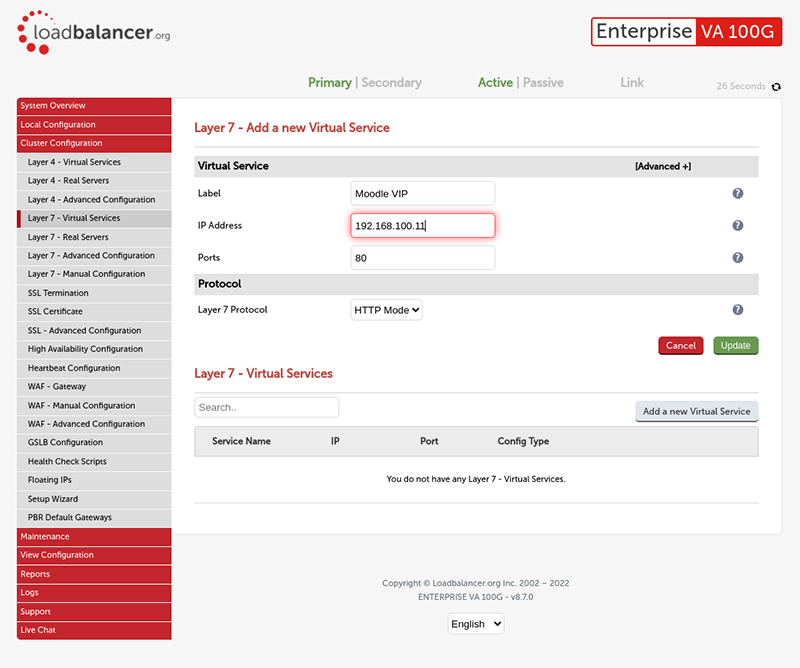
3. Enter the appropriate Label and IP address, leave the port field set to 80, protocol to HTTP, then click on the 'Update' button. After doing so you will be prompted to 'Reload HAProxy' (see the blue banner at the top), so click on that as well.
4. Navigate to Cluster Configuration>Layer7 Real Servers and click on the 'Add a new Real Server' button next to the newly created VIP. Enter the IP address of the Real Server that is serving Moodle, leave all other fields as they are, and click the 'Update' button. After doing so you will be prompted to 'Reload HAProxy' (see the blue banner at the top, again), so click on that as well.
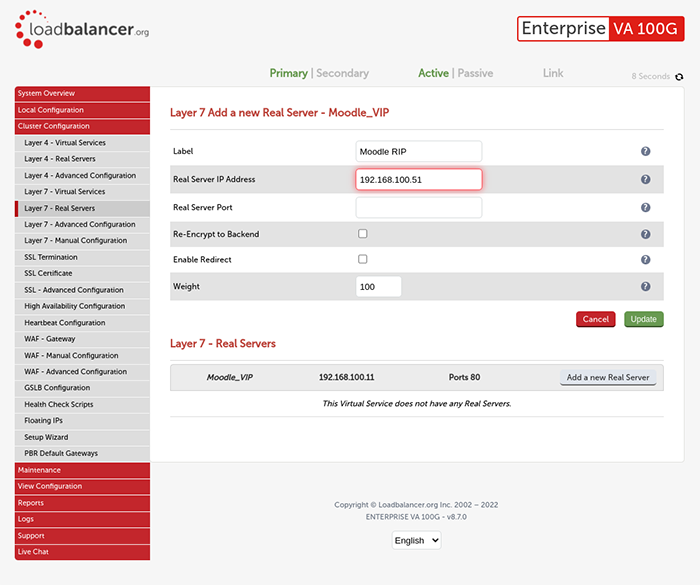
Repeat Step 4 as many times as needed to add all of your Real Servers.
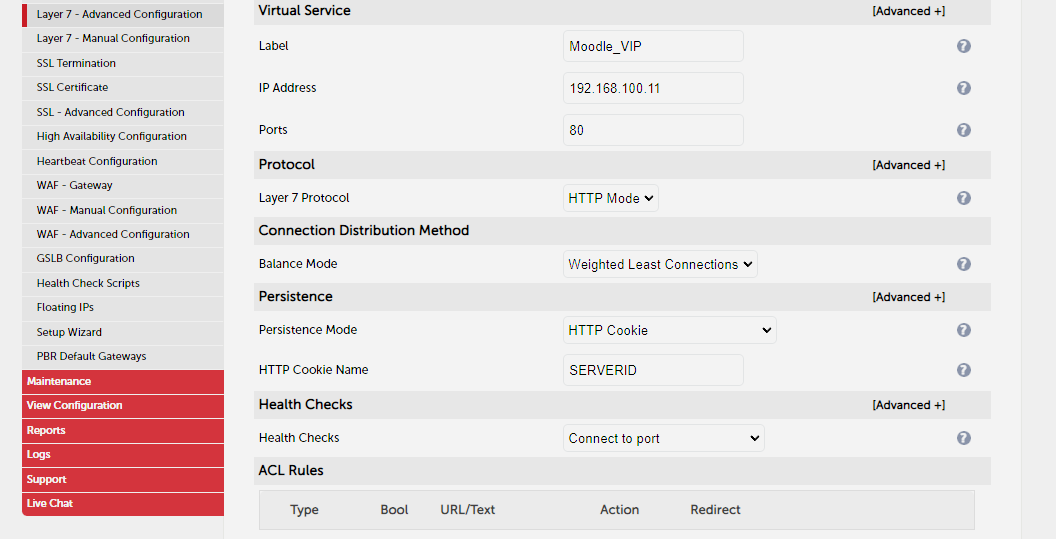
5. Go to Cluster Configuration, Layer 7 Virtual Services and click on 'Modify' next to the newly created Moodle VIP.
Under Persistence, we can either use: Source IP, Application Cookie or None. You will need to set the timeout to be the same as the Inactivity Timeout set in Moodle under the Online users tab during your configuration. Note, you also have a '?' next to persistence where all methods are explained.
After selecting the desired value and persistence type, click on 'Update' and you will again be prompted to 'Reload HAProxy'.
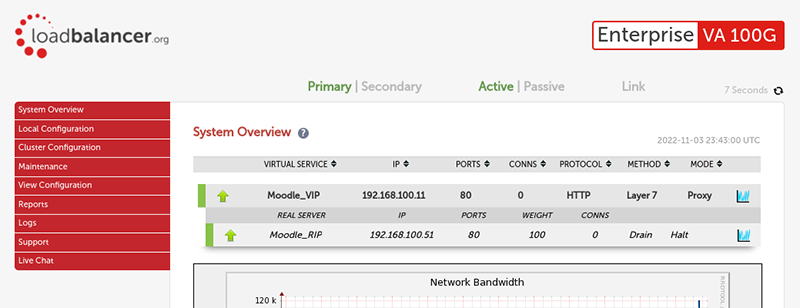
6. Now navigate to the System overview. It should look like this:
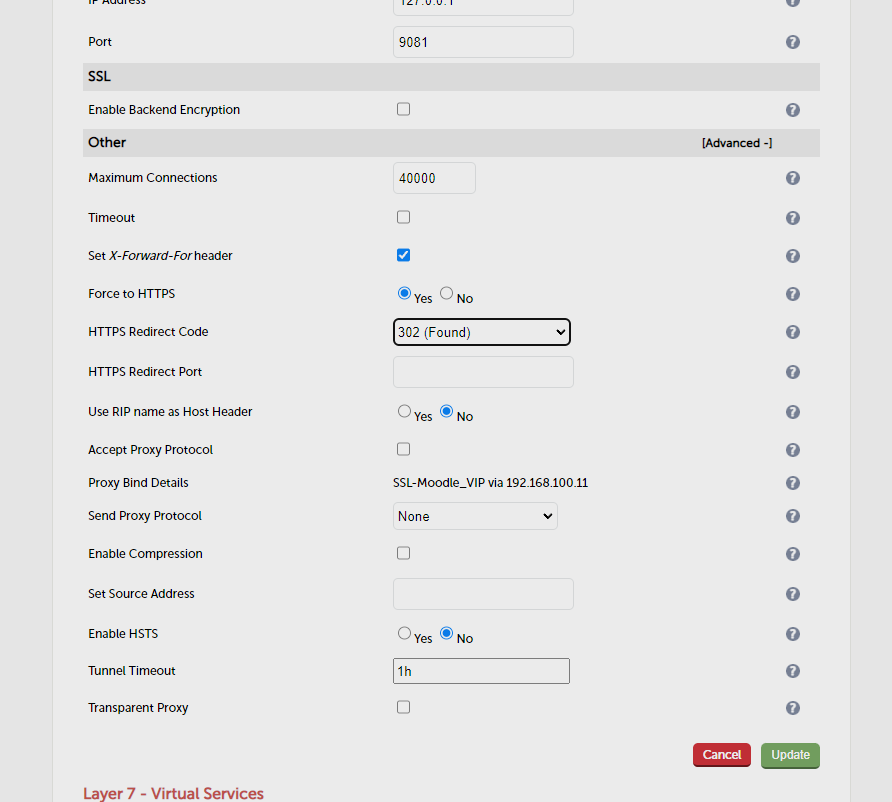
7. (Optional) If transparency is required and you need the originating IP address of the client, you need to navigate to Cluster Configuration>Modify the Moodle VIP, scroll to the bottom, click on the 'Advanced' dropdown, and simply 'Enable Transparent Proxy'.
Please be advised that additional steps need to be taken on the Real Servers in order for this to work. The gateway of the RIP needs to be an IP address from the Loadbalancer, please refer here to page 144 of our administration manual.
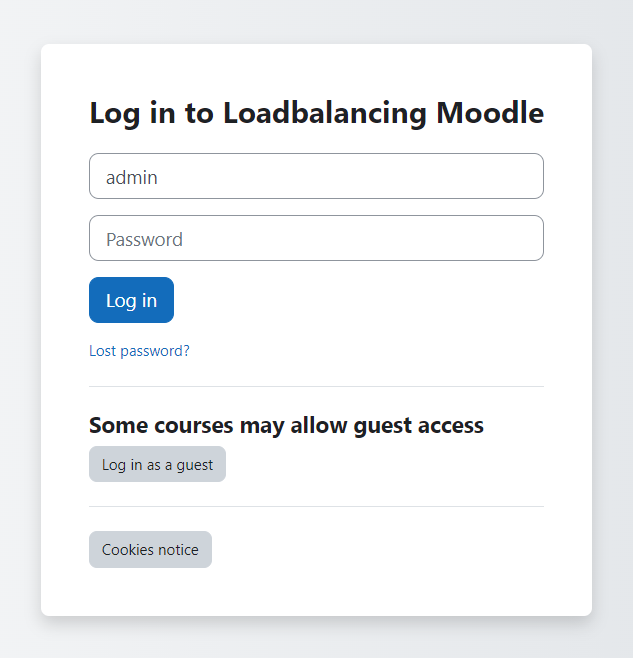
Now, if you try accessing the VIP IP, you should be redirected to the RIP and be able to access the Moodle login page:
And that's it!
L7 HTTPS deployments
For L7 HTTPS deployments, steps 1 to 7 (above) still need to be followed. However, these additional steps are then required to be taken on the Loadbalancer...
1. Go to Cluster configuration, navigate to 'Layer 7 Virtual Services', and click modify to the newly created VIP, scroll to the bottom, click on the 'Advanced' dropdown, and set the 'Force To HTTPS' option to 'YES', and the redirect code to '302'.
If you try to access the VIP, it won't work and you will get a 'Refused connection' error as additional steps are required.
2. We need to create an SSL termination for the VIP in order to make the 'Force To HTTPS' option work, so please navigate to Cluster Configuration, SSL Termination and click on the 'Add a new Virtual Service' button on the right side.
3. Add a label to your SSL Termination and from the 'Associated Virtual Service' dropdown select the Moodle VIP. Click on 'Update', and you will be prompted to 'Reload HAProxy and STunnel' on the blue banners on the top. After reloading both you will be able to access the VIP IP, and be redirected to HTTPS.
Note, the Moodle server needs to be configured to support SSL proxies, and to ensure that all URLs are HTTPS rather than HTTP. This configuration is stored in config.php which is located in the moodle/htdocs directory.
To do this we need to make the following changes...
Step 1: Firstly, configure Moodle to not do any SSL processing because that is being performed by the Loadbalancer:
$CFG->sslproxy = 1;
Step 2: Next, tell Moodle to rewrite all URLs with HTTPS. This needs to be done in your Moodle config.php file — NOT on the load balancer. The config.php file usually selects the reply protocol based on the client request protocol.
Before:
if ($_SERVER['HTTPS'] == 'on') {
    $CFG->wwwroot   = 'https://' . $_SERVER['HTTP_HOST'] . '/moodle';
} else {
    $CFG->wwwroot   = 'http://' . $_SERVER['HTTP_HOST'] . '/moodle';
}
After:
$CFG->wwwroot = 'https://' . $_SERVER['HTTP_HOST'] . '/moodle';
The if statement can be removed as all links are now https, leaving just the rewrite to https command.
Note, changing to https:// ensures that all URLs are prefixed by the correct protocol.
And there you have it! An optimized Moodle deployment. Hopefully, that was helpful. If you're trying to do this and come unstuck, feel free to reach out to our tech team, and we'll be only too happy to help.