Have a custom ADC Portal account and want to add SAML (Security Assertion Markup Language)? Simply follow the five steps outlined below. For anything else, check out our ADC Portal Quick Start Guide or contact our technical team.
Note, SAML can only be added by the ADC Portal Admin for your Organization.
Step-by-step instructions on how to add SAML
Step 1: What to do in the ADC Portal
- The first step is to log in to the ADC Portal and navigate to the Organization page.
- You will find the SAML setup under Security --> SAML.
- The user will see this page:
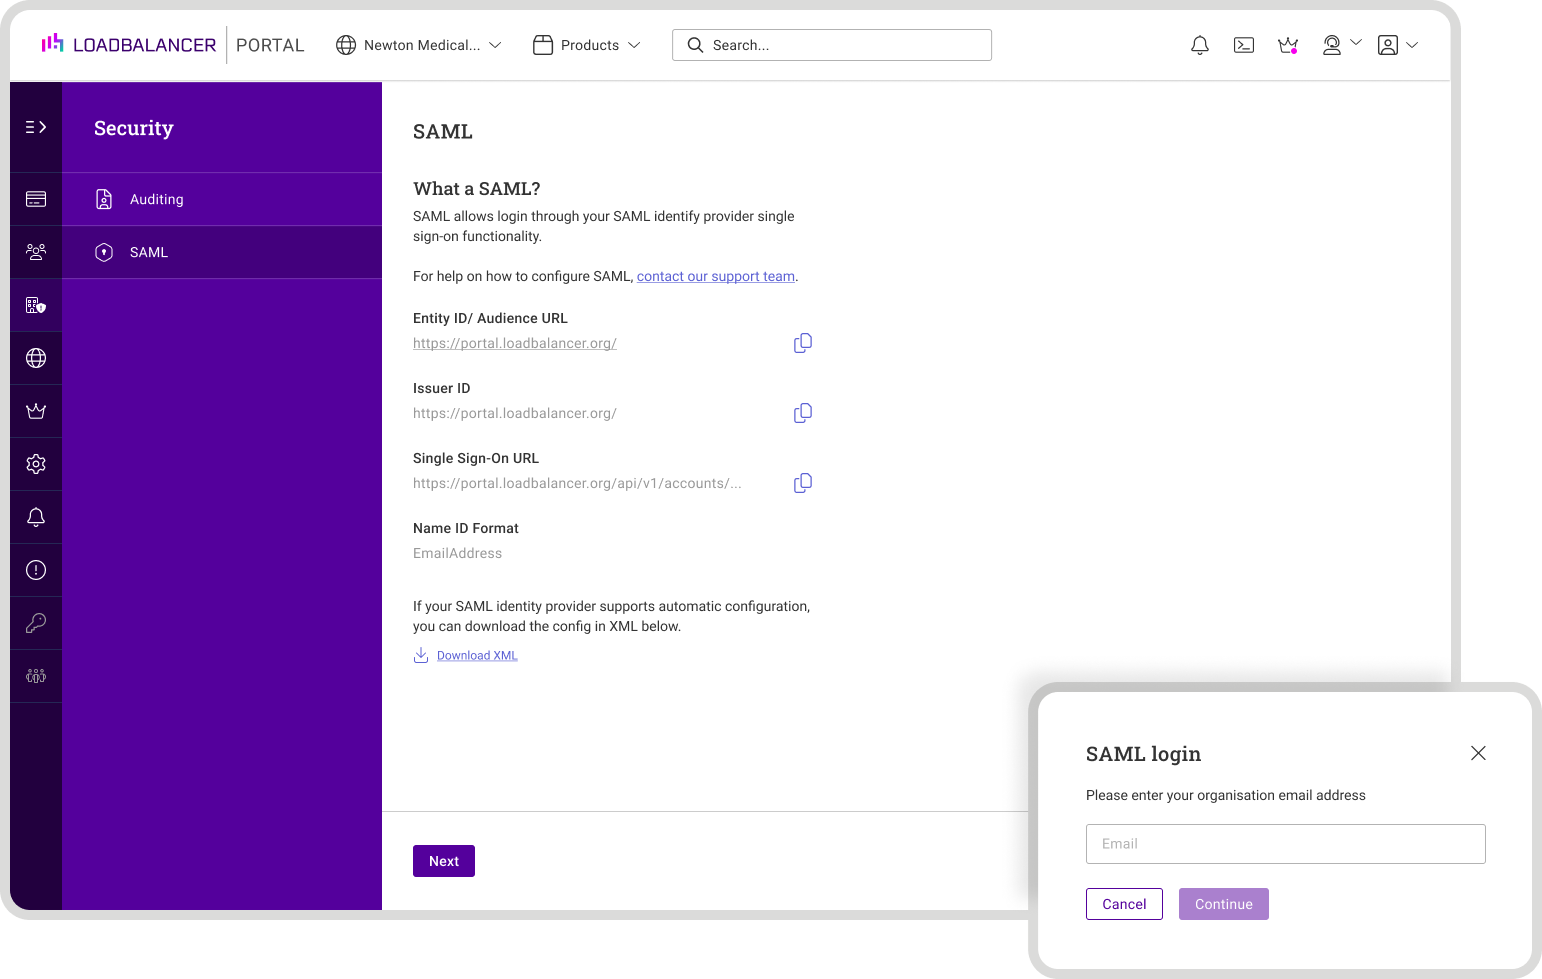
- Do NOT click 'Next' until you've completed Step 2.
- Instead, keep this tab open as it contains information that will now need to be copied into the appropriate parts of your users Identity Provider (IdP) profile. The specific authentication steps needed will be unique to your Identity Provider, but included below are the steps for Azure, as an example.
Step 2: What to do in your Identity Provider (Azure example)
- Log into Microsoft Azure
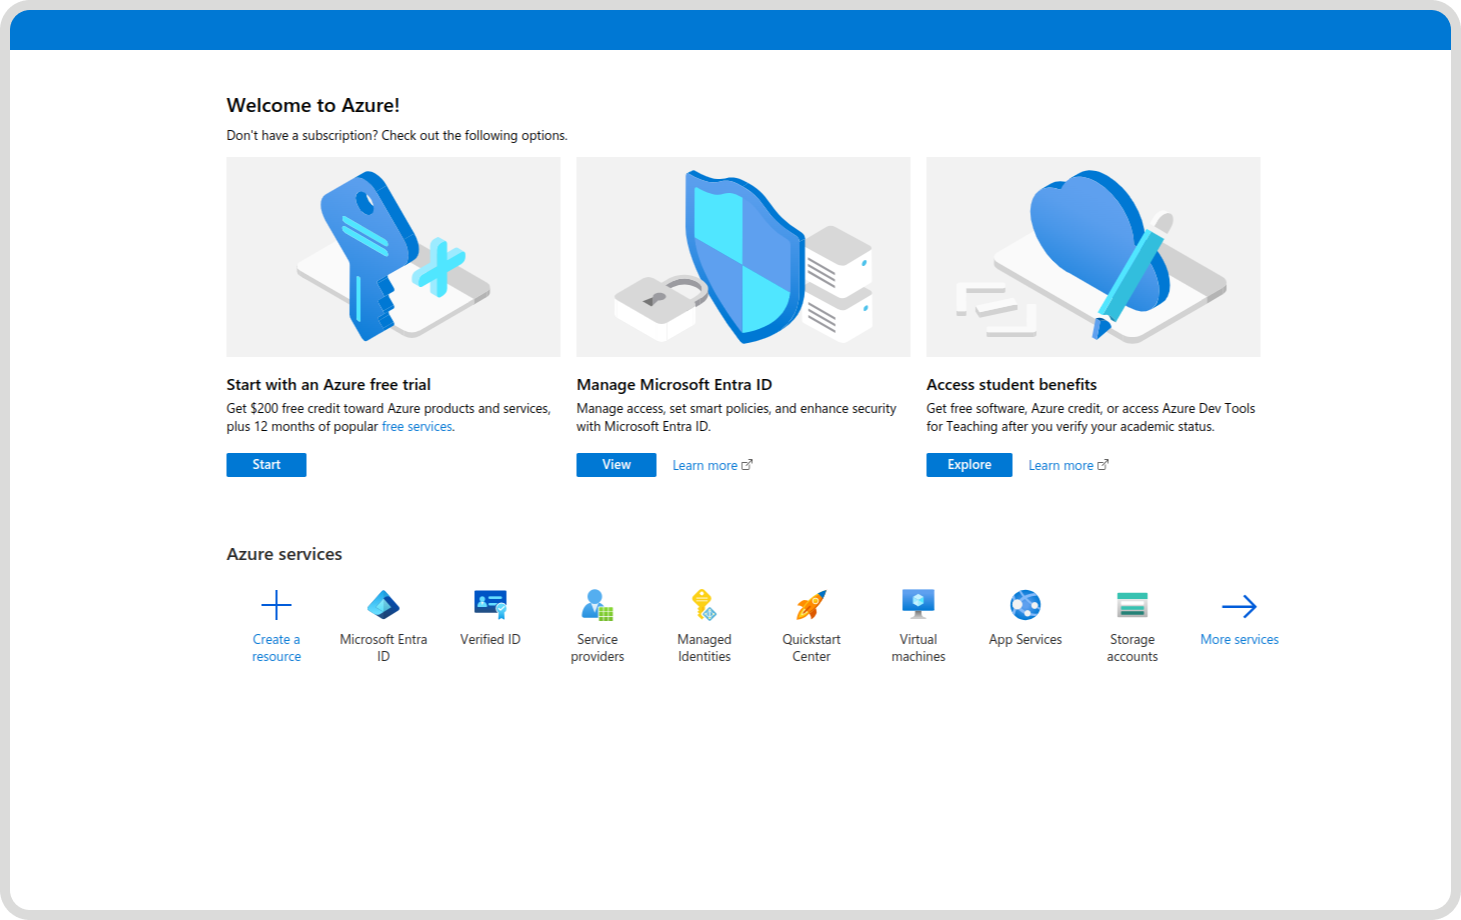
- Under Azure Services, navigate to "Microsoft Entra ID" (formerly Azure Active Directory):
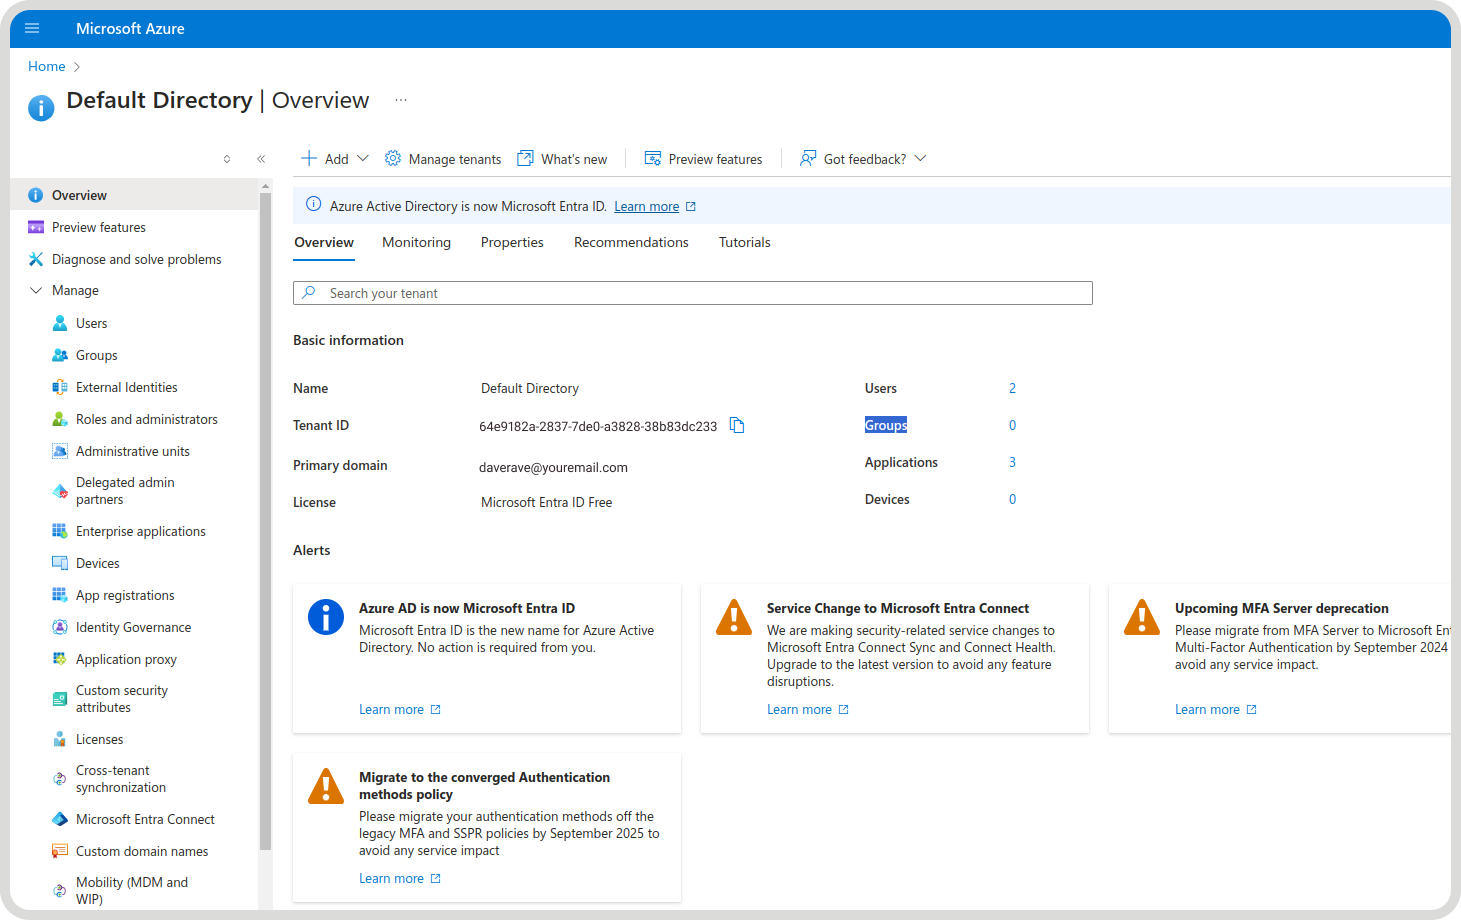
- In the Default Directory within Entra ID, on the left hand side, select "Enterprise Applications":
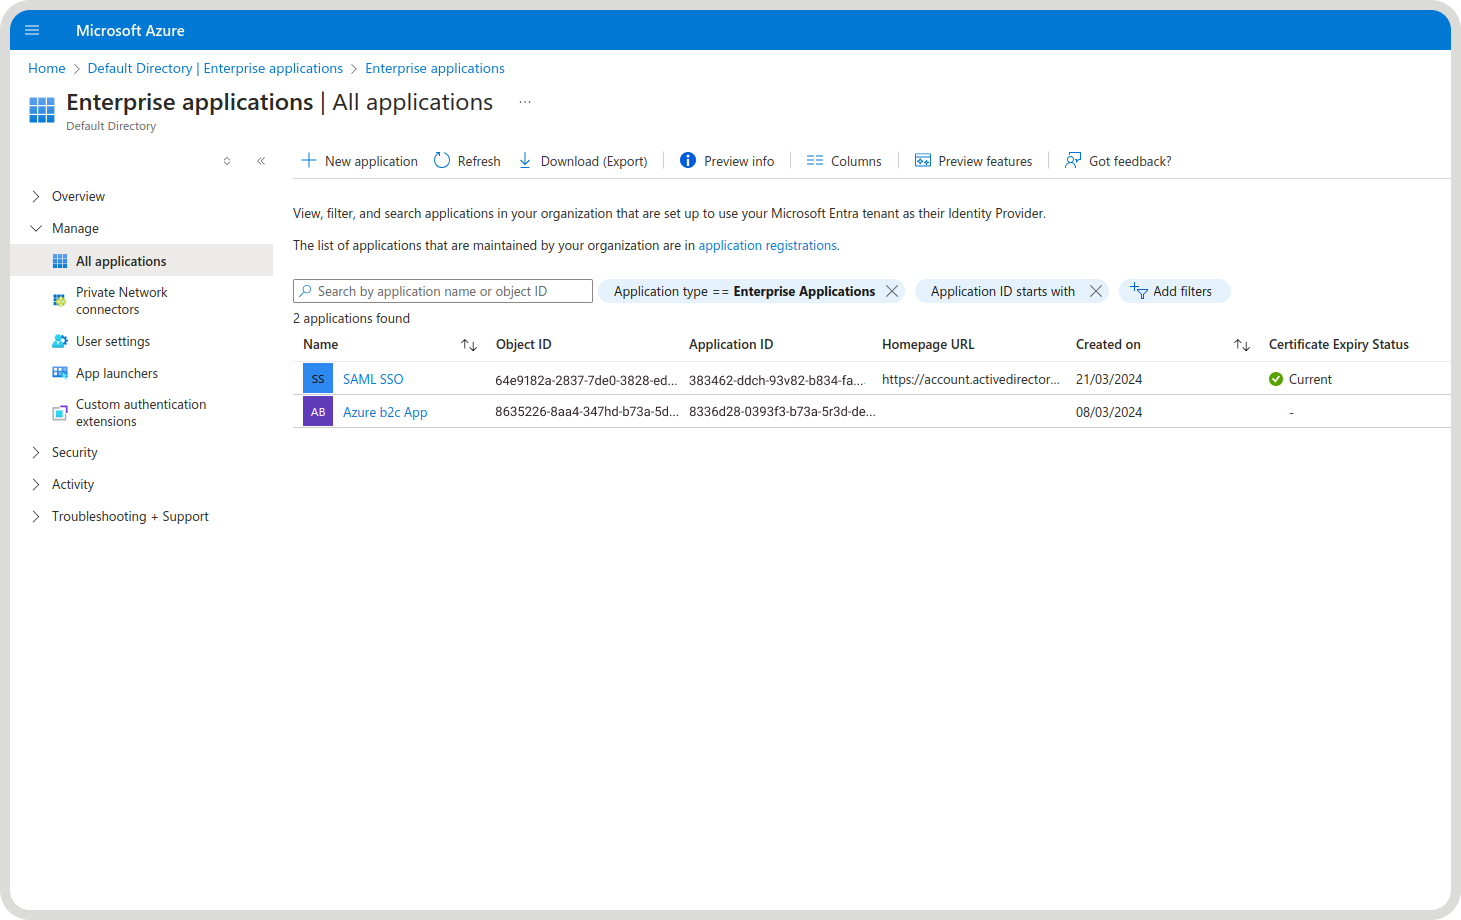
- Next click "+ New Application":
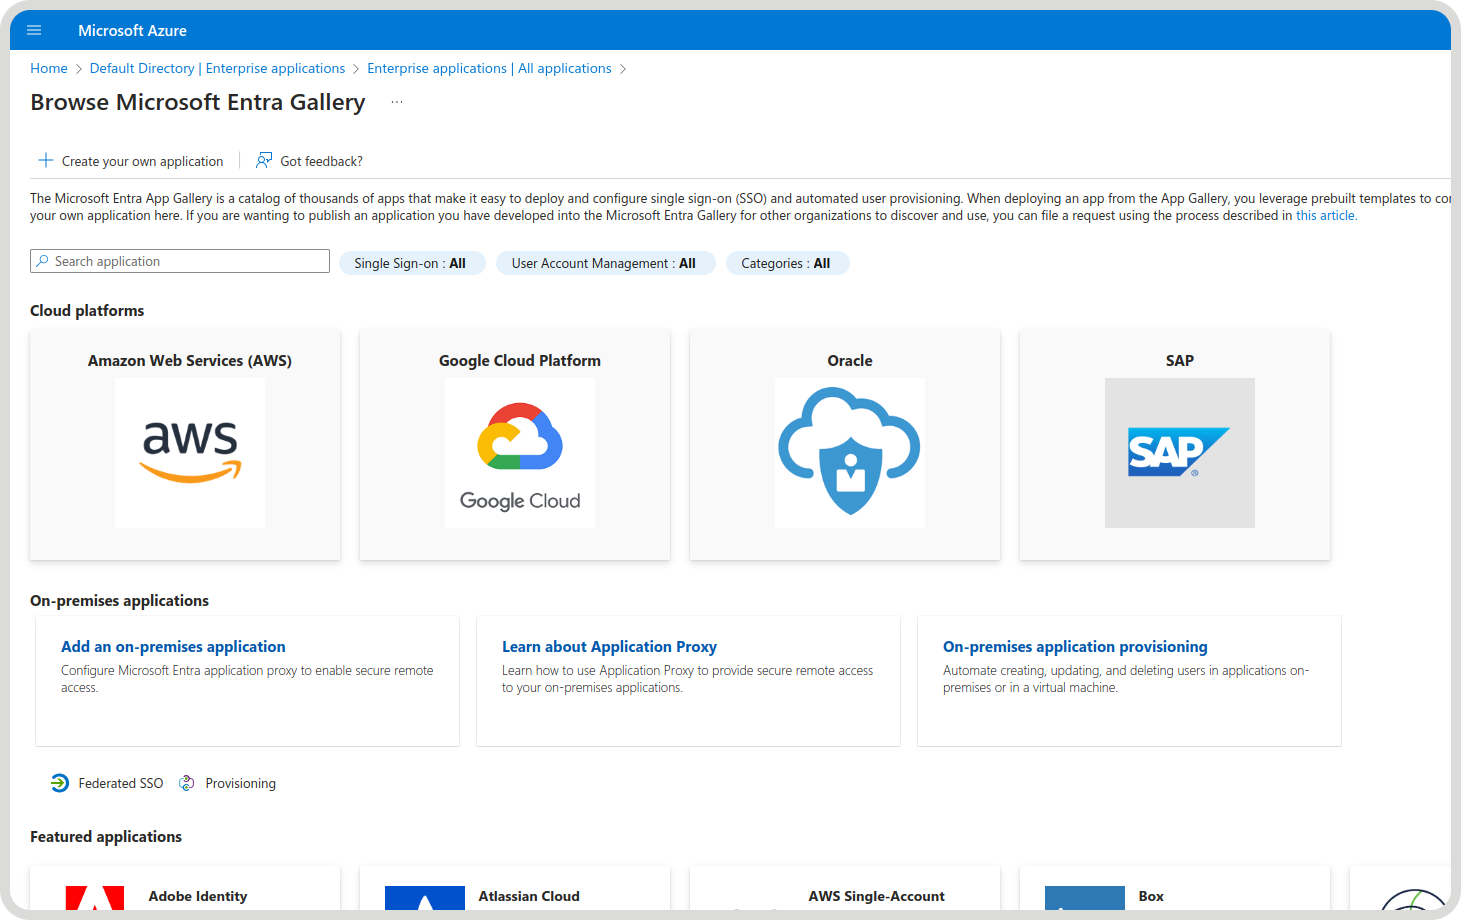
- This should then show you the following, which gives you the option at the top to "+ Create your own application":
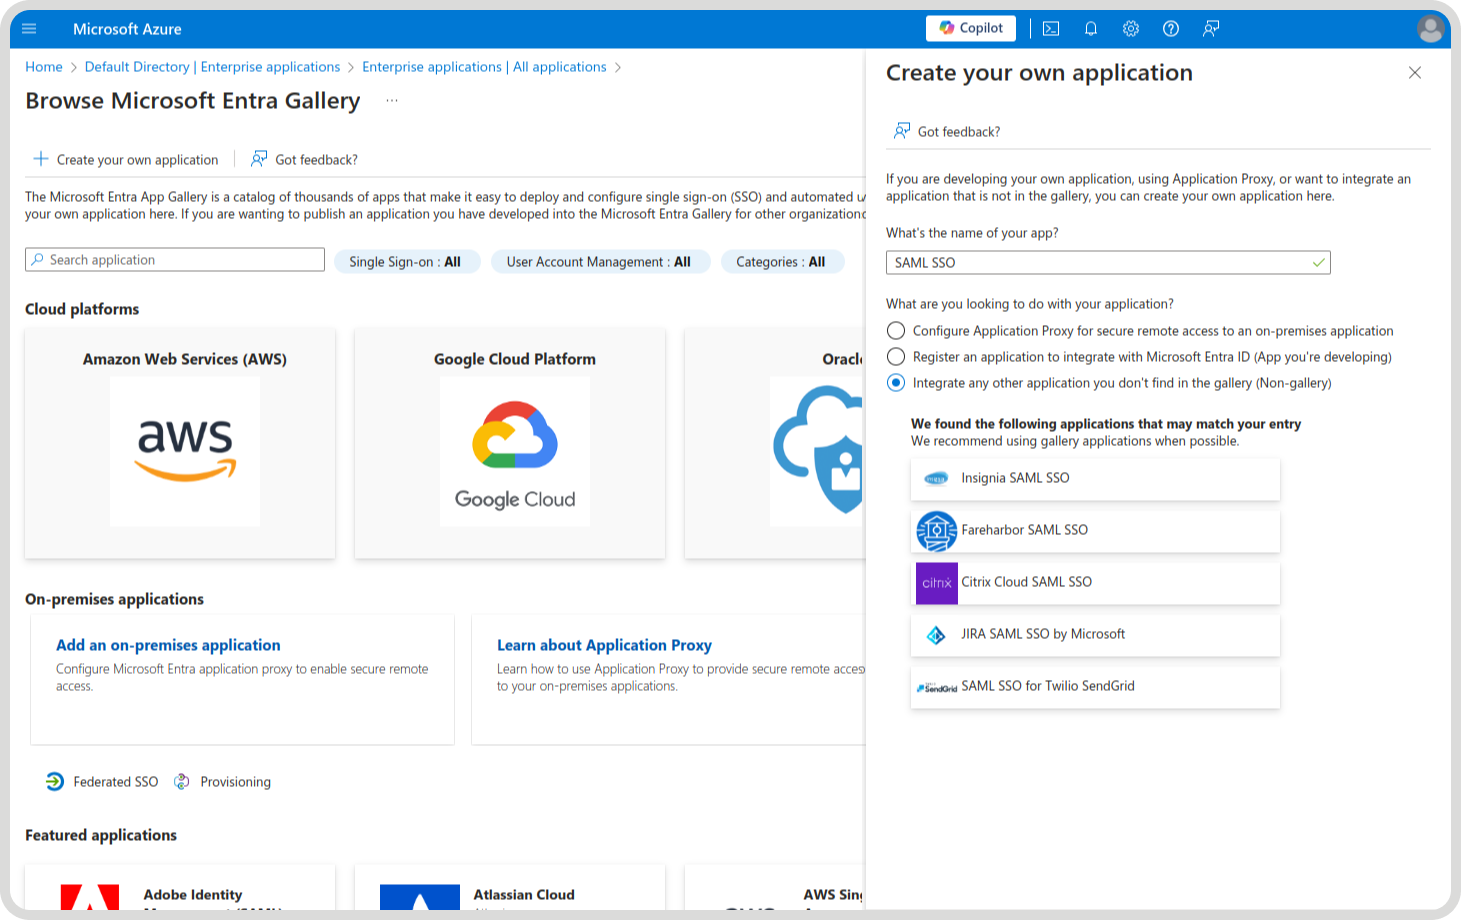
- Within the "Create Your Own Application" menu, select the option on the right to “Integrate any other application you don’t find in the gallery (Non-gallery)":
- Then press the "Create" box. Adding the application may then take some time:
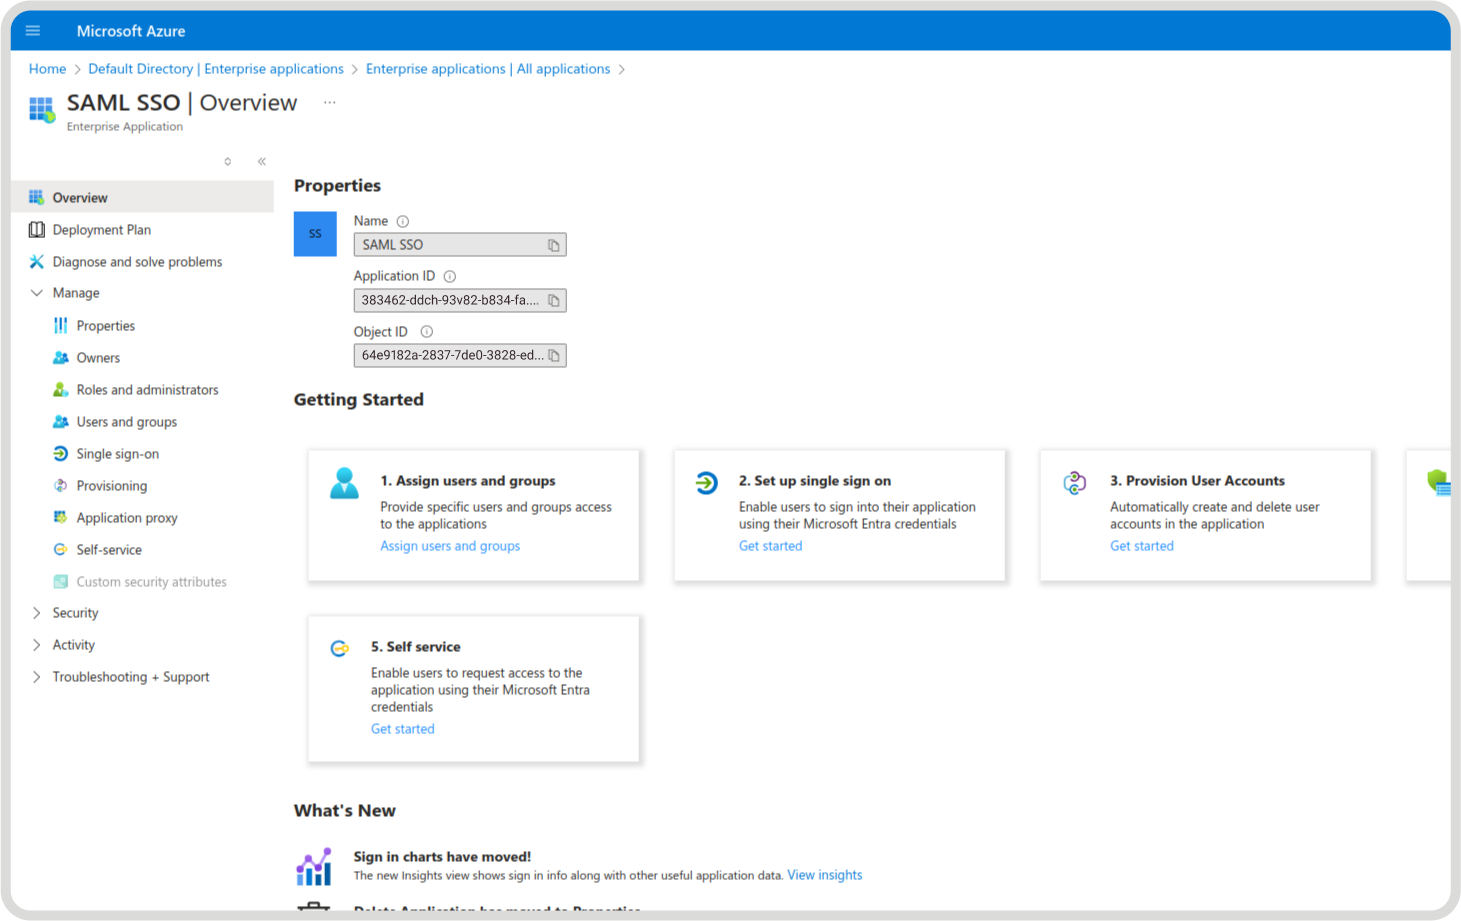
- Within the newly created 'SAML SSO' application, click on "2. Set up single sign on" and then "Get started" underneath.
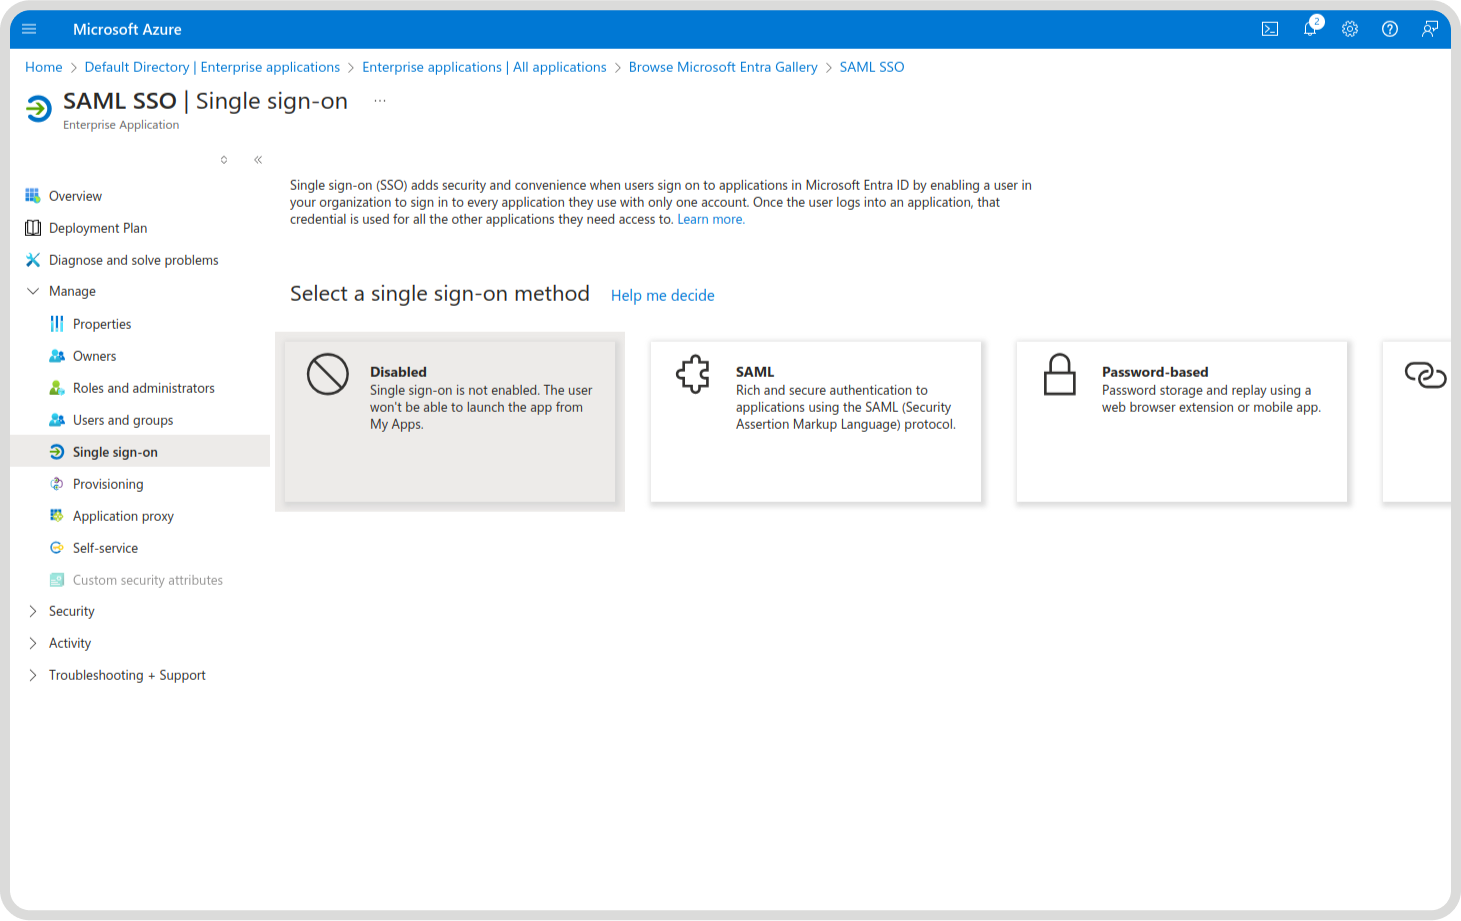
- Navigate into the Single Sign-On menu and select the SAML option:
- 'Edit' the Basic SAML Configuration, and fill in the "Required" components provided in the ADC Portal from Step 1 (above):
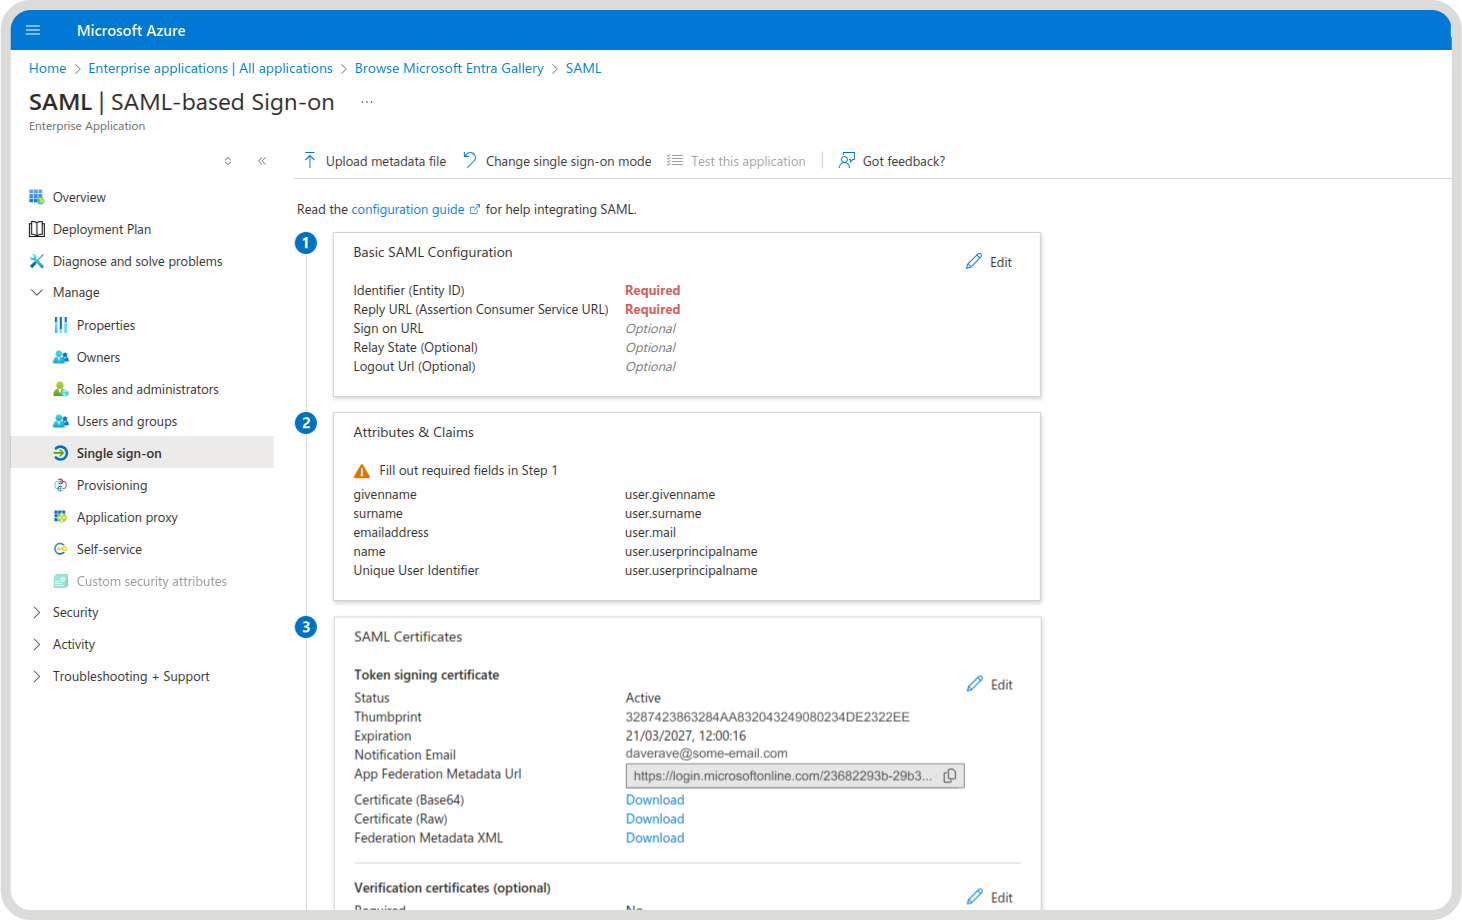
- The output with all the details added should then look like this:
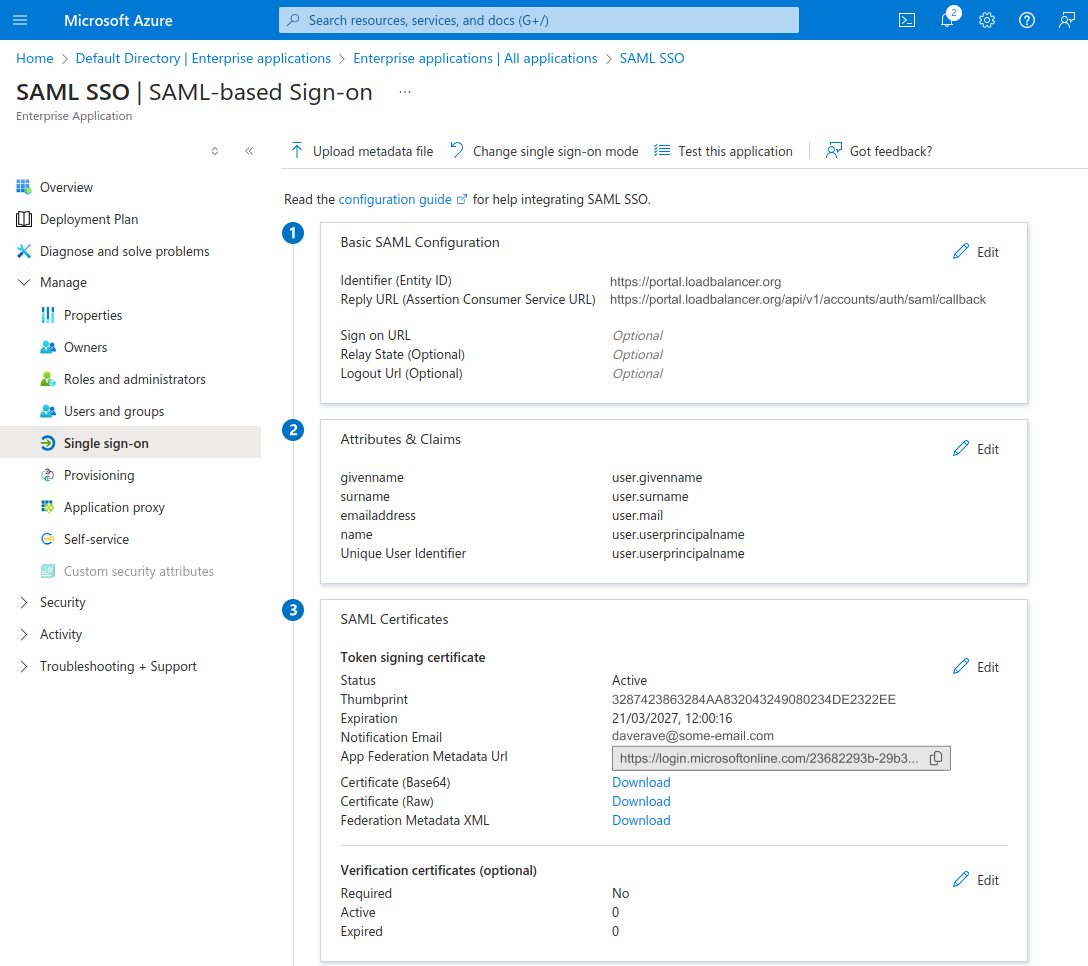
- You will then need to copy the "App Federation Metadata URL".
Step 3: Putting it all together
- Once you've completed step 2, return to the ADC Portal and click "Next" on the SAML page.
- You then need to paste the Metadata URL into the box shown below (please note, the metadata URL differ between different Identity Providers):
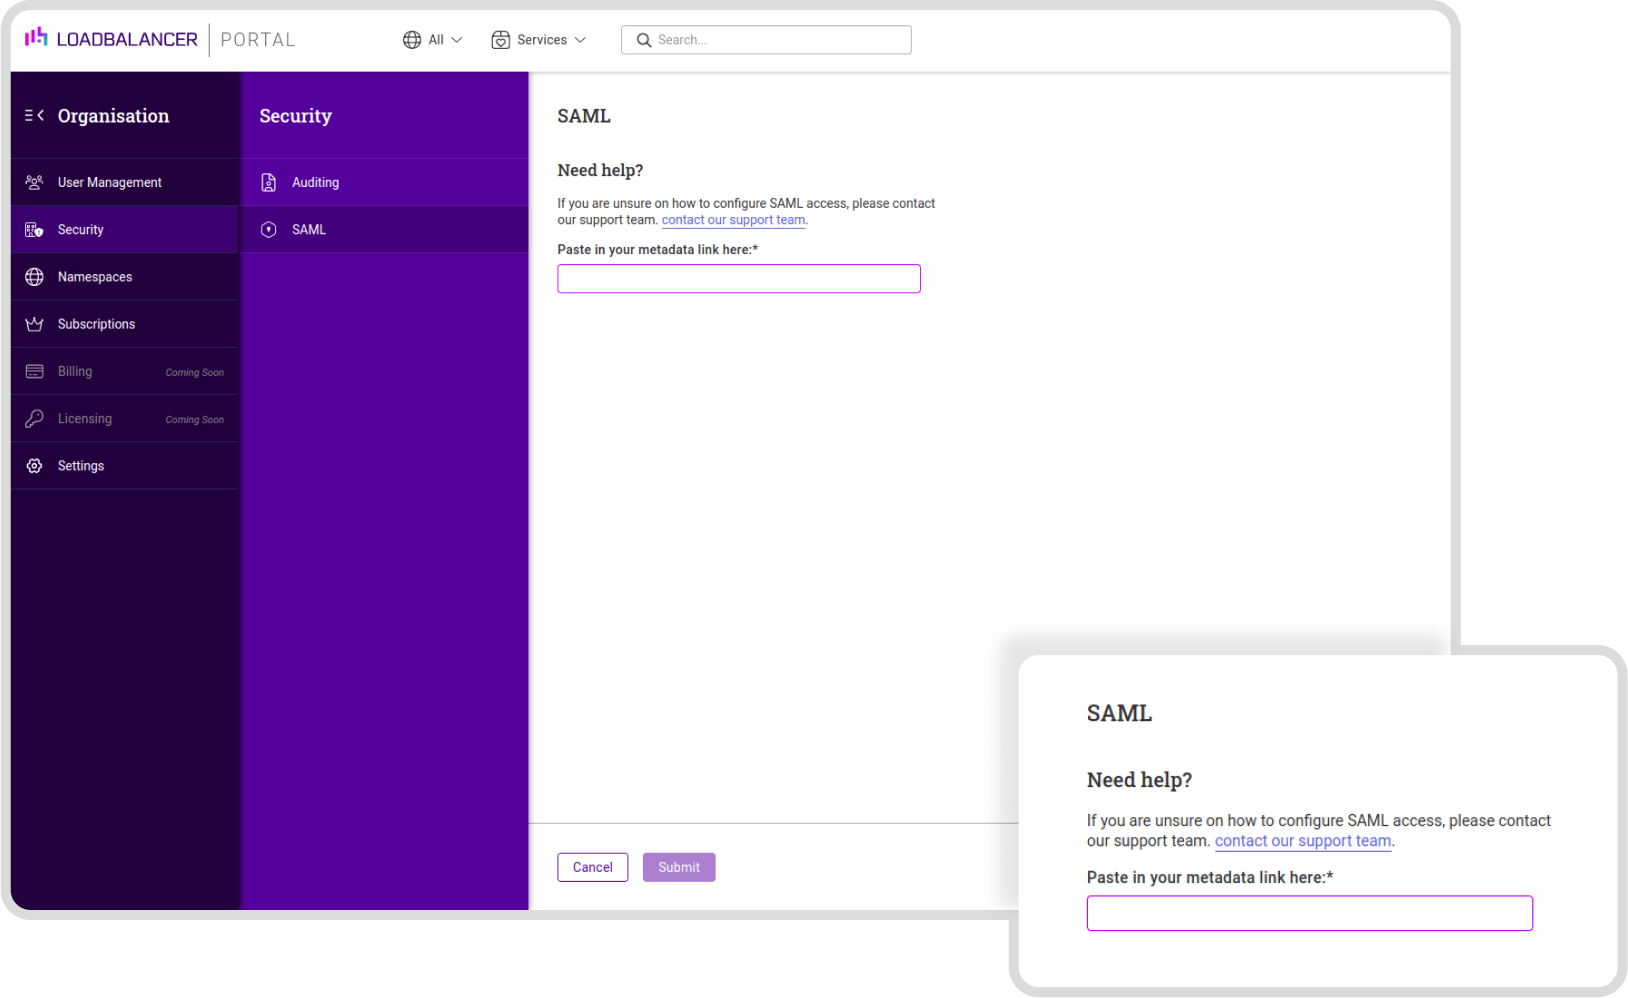
- Click "Submit".
And that's it! SAML has now been added to your ADC Portal account, and ready to use!
Want something tailored?
Need something completely tailored in the Loadbalancer ADC Portal to your specific needs? We’ve got you covered. Our Tailored subscription is designed to work for large enterprises, MSPs and technology partners. You’ll get a dedicated Success Manager, and access to advanced features, audit logs and professional services. Book a meeting with our Sales team to discuss.


