
As IT professionals, we’ve all been in the situation once or twice in our lives where we’ve made a very silly mistake and done something that leaves us red-faced and wanting to crawl into a very small space to rock away the pain. Whatever the reason (be it pulling an all-nighter with a lack of coffee, or maybe one of those confusing confirmation messages that ask a double negative question), we all make mistakes.
Side note: if you haven’t encountered this yet, then you’ve not been doing it long enough :-)
From accidentally running a command that shuts down your production server, or crashes your Oracle Database, or even performs an rm -rf /*, you know all too well the pain, the suffering, and the impending fallout that you’ll be on the receiving end of (oh, and did I mention all of the micro-management?).
How much time and effort will you need to devote until you can restore service? Well, that totally depends on the severity of the blunder: a server that was accidentally shutdown may only take a few minutes to recover from (you do have remote power management access to your servers, right?), plus some cakes for the office to smooth things over. On the other end of the scale, a serious mistake could consume hours/days/weeks of your life rebuilding your entire environment (hopefully your backups are in working order: have you checked them, lately?).
Here at Loadbalancer.org, just like with every other application/appliance out there, you have the ability to absent-mindedly break the installation with just a single click. Here I will show you how not only to break your SSH keys but also how to restore them in the event you end up doing the same thing as me....
Part 1 - Breaking It: Delete the SSH Keys
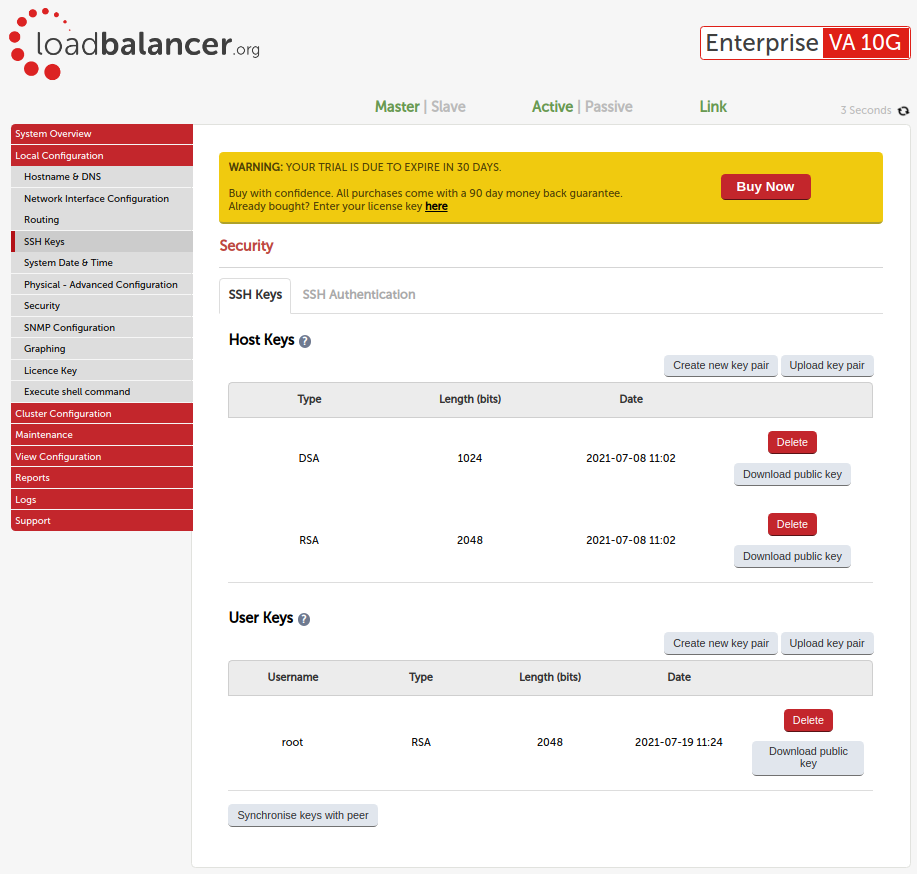
1.On one of the Loadbalancer.org appliances, navigate to Local Configuration > SSH Keys
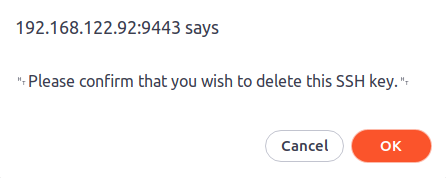
2.Under User Keys click on Delete. Depending on your browser, you may see a confirmation prompt like the following: click on OK to confirm:
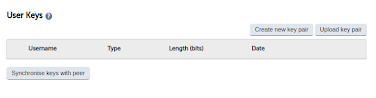
3.We can now see that the User Keys section is empty:
This is bad because SSH communication with the other load balancer in the HA pair is now broken. The load balancers can no longer synchronise their configurations. Attempting to make a configuration change, like modifying a virtual service from the WebUI, for example, causes scary looking error messages to appear, like the following:

Part 2 - Enable Console/SSH Access
To fix this problem, we’ll either need console or SSH (password based) access to the load balancers. These are disabled by default, so let’s enable them.
- Navigate to Local Configuration > Security:
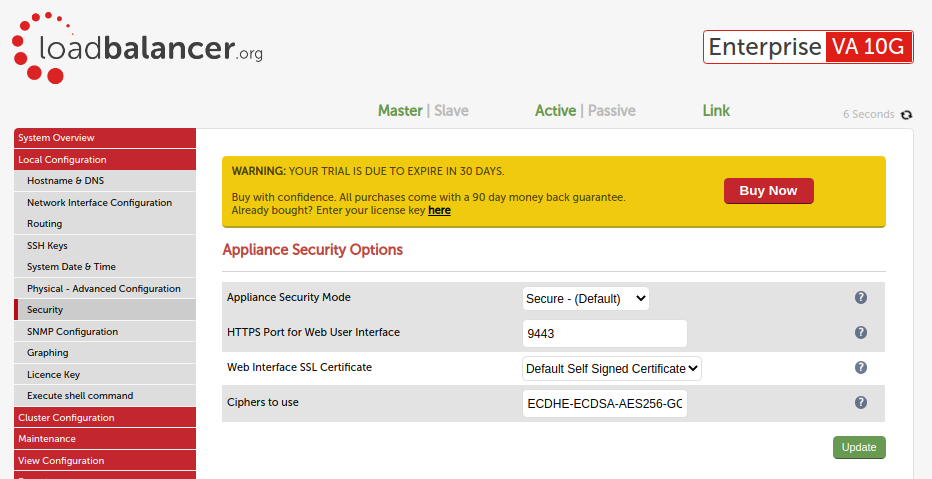
2. Set Appliance Security Mode to Custom:
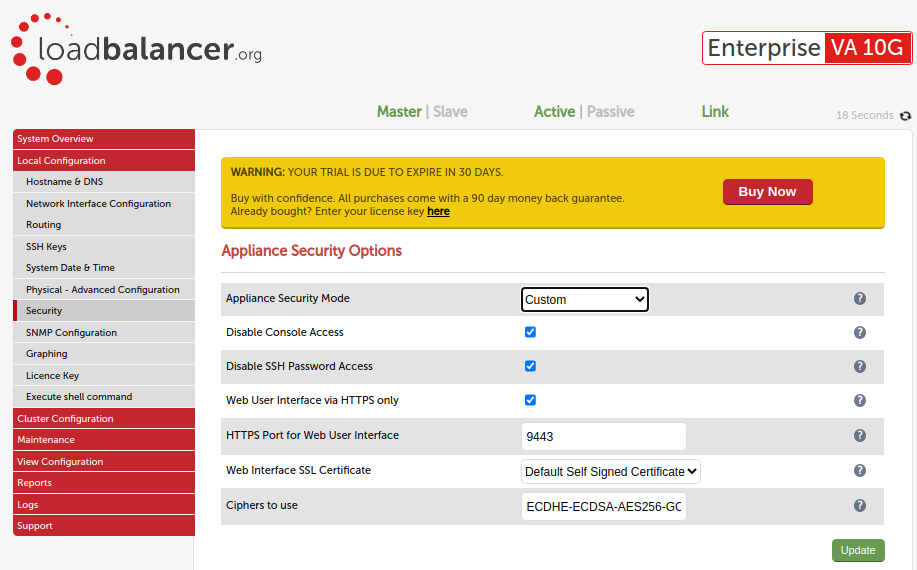
3. Untick Disable Console Access and Disable SSH Password Access.
4. Click on Update to enable console and SSH access to the appliance.
5. Repeat this process for the other load balancer in the HA pair.
Part 3 - The Fix Preparation
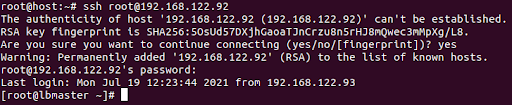
- Using your favourite SSH application, connect to your Loadbalancer.org appliance:
2. For cleaning up purposes, we’ll remove the .ssh directory. Note that the “.” makes the directory hidden: we can view it using “ls -la”:
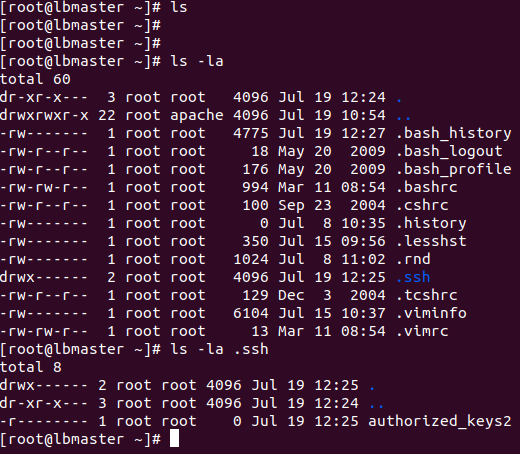
3. Enter the command “rm -rf .ssh” (remember what I said at the beginning of this blog: be very careful with this command!).
4. We’ll also clean up the file known hosts file located in "etc/ssh/ssh_known_hosts" by executing > /etc/ssh/ssh_known_hosts :

Part 4 - The Fix
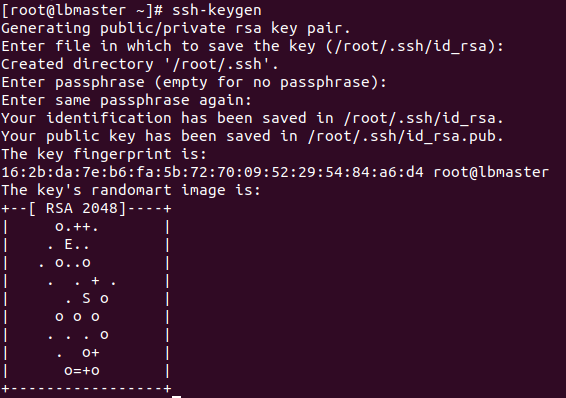
- Run the command
“ssh-keygen”to generate a new private/public RSA keypair for your Loadbalancer.org appliance. Press “enter” 4 times to accept the default settings:
2. Copy the public RSA key to the second Loadbalancer.org appliance using the command “ssh-copy-id <ip of 2nd host>”. Enter the password when prompted
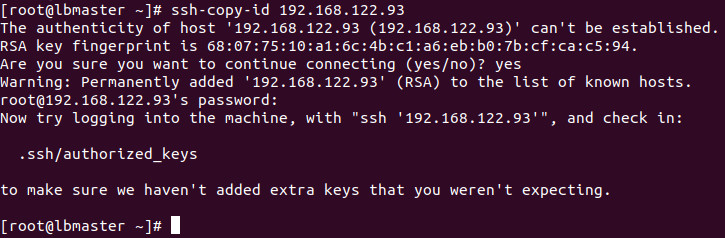
3. Test the SSH connection by running the command “ssh <ip of 2nd host>”. If all is well, you should be logged in to the 2nd host without being prompted for a password
Part 5 - The Cleanup
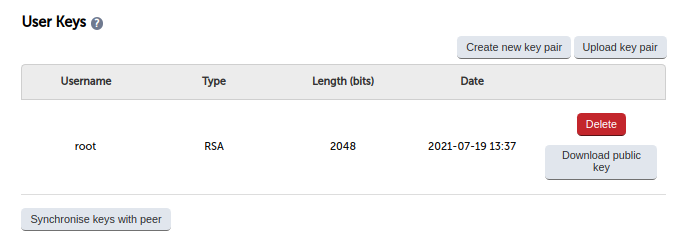
- Log into the WebUI and once again navigate to Local Configuration > SSH Keys. The User Keys section will be populated again:
2. Click on the Synchronise keys with peer button and wait for the action to complete. You should see a green box confirming successful synchronization of the keys:

And that’s it, the SSH keys have now been recreated and synchronized between the two Loadbalancer.org appliances. That wasn’t so bad, was it? :-)